
Y-Belt, part 3
Like I promised, here the final part of making the Y-belt... which was a little bit held up with the arrival of the Dragon Figure :o)
I had to lay it aside, and finish what I started.
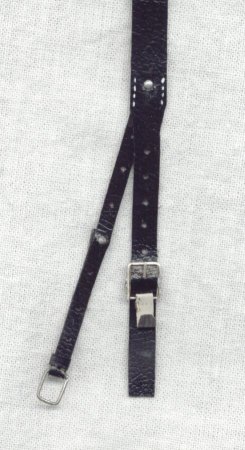
The only things missing on the belt are the side straps which are used to secure the A-Frame or other equipment carried on the soldiers back (f.i. MG ammo-cans) so I started making them.

 I wanted them to be adjustable as well so I figured out
a way to make little pins of plastic.
I wanted them to be adjustable as well so I figured out
a way to make little pins of plastic.
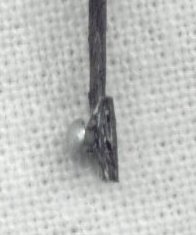
These shots show close-ups of the little pin at the end of the belt.
Making them was a piece of cake once you get the hang of it. I'll explain :
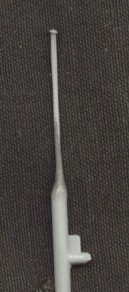 This
picture shows a piece of sprue (as you can find them in plastic models) First heat it up a
little bit , and stretch the plastic until you got the desired length. Let it cool down
for a while, cut it apart, and heat the end with a lighter, until the plastic starts
melting again.
This
picture shows a piece of sprue (as you can find them in plastic models) First heat it up a
little bit , and stretch the plastic until you got the desired length. Let it cool down
for a while, cut it apart, and heat the end with a lighter, until the plastic starts
melting again.
As you can see, you now have a little pin.
 The
same method was used to secure the straps on the Y-belt, as you can see on the this
picture.
The
same method was used to secure the straps on the Y-belt, as you can see on the this
picture.
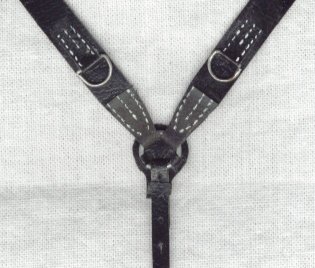 Another
thing I had to do was make the little leather circle underneath the ring.
Another
thing I had to do was make the little leather circle underneath the ring.
I'm not exactly sure what it's purpose is, other than to hold the securing strap for the back piece of the belt, but maybe one of my readers knows the answer for this.
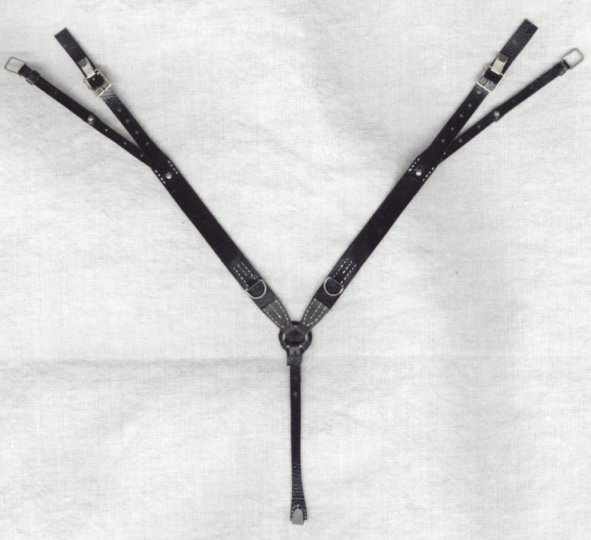
Now................. Finally..... it's finished !!!!!!!!!!!!
A hell of a job, I asure you, but I think the end product looks good !
And on the next page one final shot of the Y-belt on the Cotswold Soldier